Free 2 Drawer File Cabinet Plans
Gratis Article of furniture Plans to Build a File Cabinet
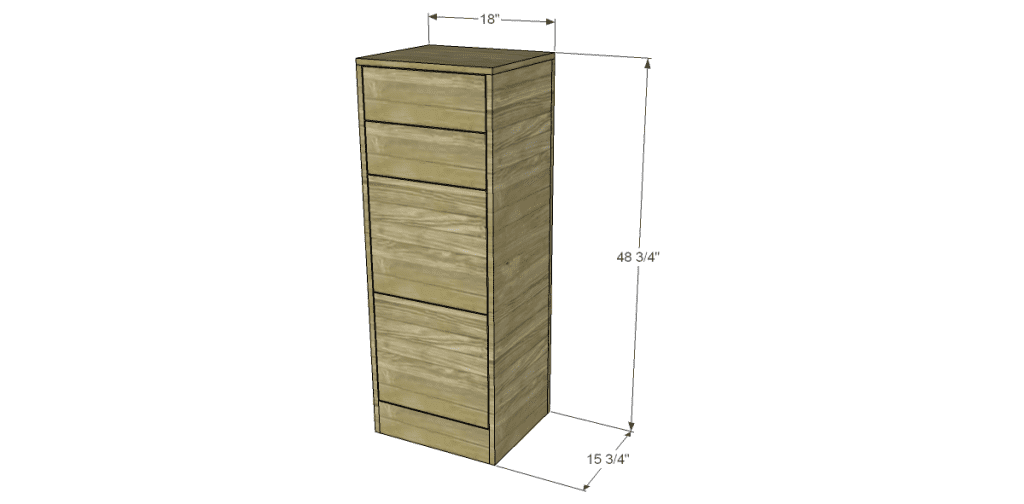
Free furniture plans to build a file cabinet that is easy to build and totally customizable. The depth should stay the same but the length can be increased to fit your needs! Click on the drawings to overstate them!
Materials:
- 1-1/4″ pocket hole screws (<– affiliate link!)
- One sheet of iii/4″ plywood
- Edge banding to lucifer the 3/4″ plywood (<– affiliate link!)
- Ane one-half canvass of one/2″ plywood
- One half sheet of 1/4″ plywood
- Two – one/eight″ x 1/2″ x 36″ strips of aluminum
- Iv 1/4″ nylon spacers
- Four 1″ screws to mount the aluminum
- Four sets of xiv″ drawer slides (brawl bearing 3/4 extension)
- Four drawer handles
Tools:
- Table saw, jigsaw or circular saw
- Drill
- Kreg jig and 1-1/four″ pocket pigsty screws
- Brad nailer and 1-1/four″ brad nails
- Square and pencil
Cut List:
- Two – 3/4″ plywood @ fifteen″ x 48″ – Sides
- One – 3/four″ plywood @ 18″ x 48″ – Dorsum
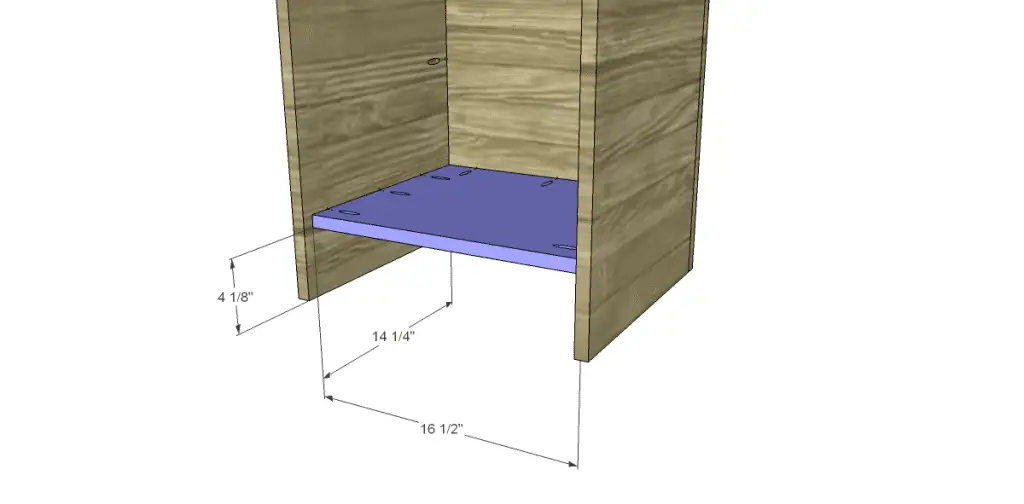
- One – 3/4″ plywood @ 14-i/4″ ten 16-1/2″ – Bottom
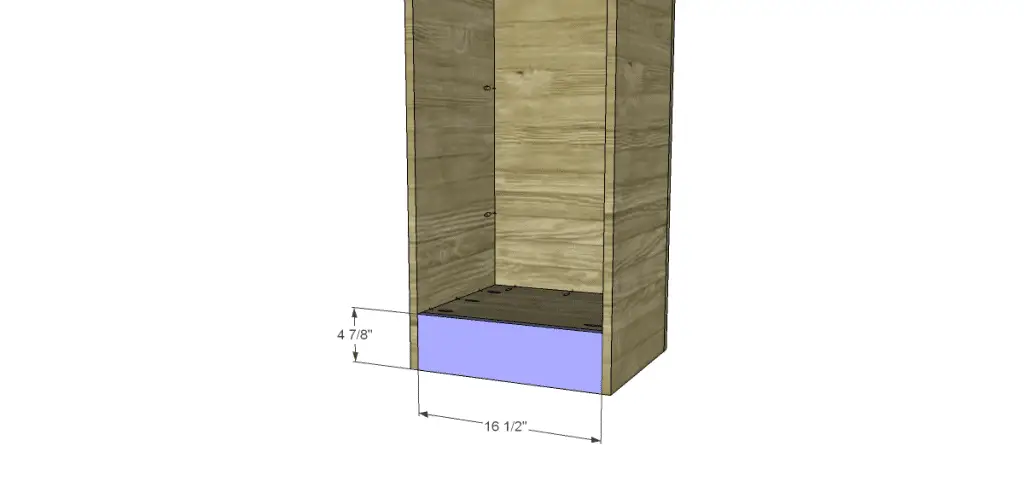
- One – 3/four″ plywood @ 4-7/viii″ x 16-1/2″ – Kick Plate
- Two – three/4″ plywood @ 2-one/2″ 10 16-ane/ii″ – Interior Supports
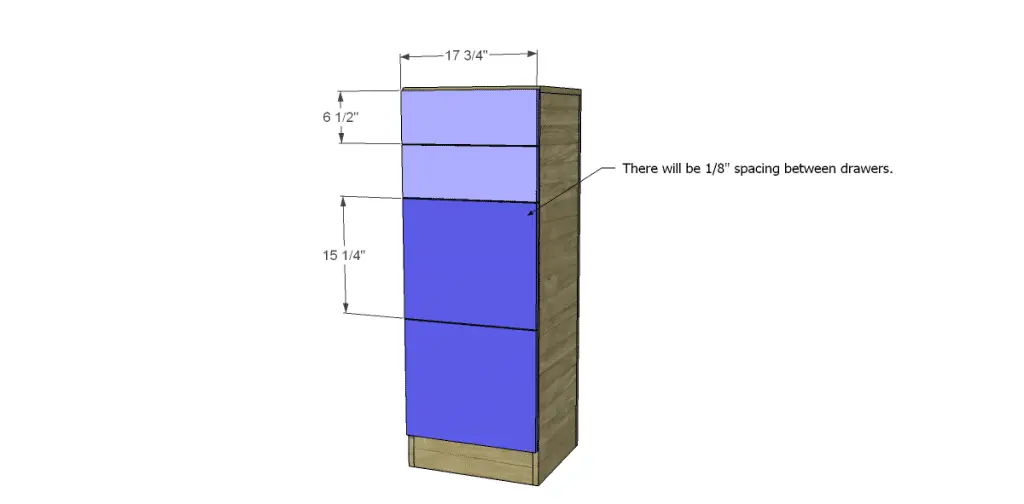
- Two – 3/4″ plywood @ six-1/2″ x 17-3/4″ – Smaller Drawer Fronts
- 2 – 3/iv″ plywood @ 15-1/4″ x 17-3/4″ – Larger Drawer Fronts
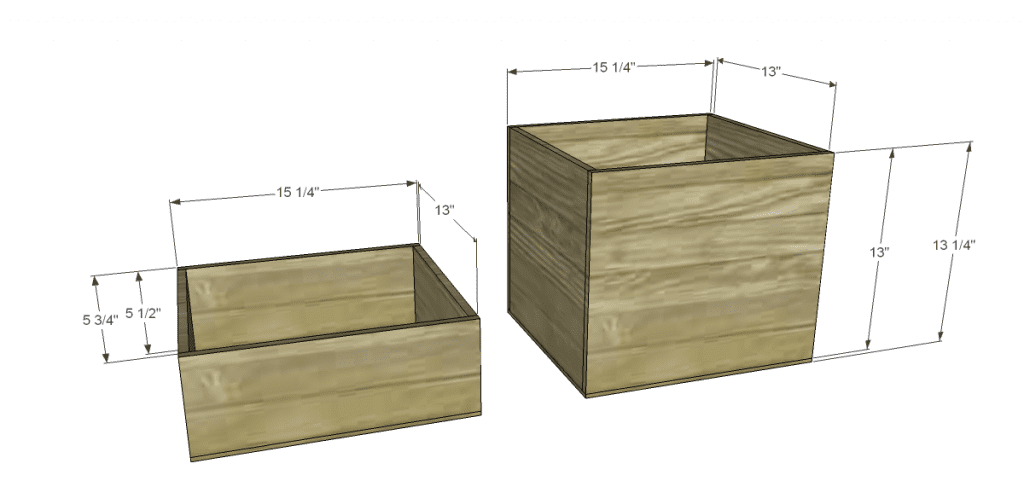
- Four – 1/2″ plywood @ 5-1/2″ 10 xv-1/4″ – Smaller Drawer Boxes
- Iv – 1/2″ plywood @ 5-1/2″ x 13″ – Smaller Drawer Boxes
- Four – 1/2″ plywood @ 13″ 10 15-1/iv″ – Larger Drawer Boxes
- Iv – one/2″ plywood @ xiii″ ten 13″ – Larger Drawer Boxes
- Four – 1/4″ plywood @ 14″ x 15-ane/4″ – Drawer Bottoms
Edge banding should be applied to all exposed edges before associates.
Stride 1
Cut the pieces for the sides and the back. Drill pocket holes for iii/4″ textile in the superlative of the sides, likewise every bit i long edge at the back. Also drill pocket holes in the top edge of the back. Recall, at that place will be a right and left! Attach the sides to the back using glue and pocket hole screws.

Step Two
Cut the piece for the bottom. Drill pocket holes in the edges to adhere the bottom to the sides and dorsum. Use glue and pocket hole screws to secure the bottom to the sides and back as shown.
Step Iii
Cut the piece for the kick plate. Drill pocket holes in each stop of this piece and attach to the sides of the cabinet. The top of the kick plate volition be flush with the top face of the bottom piece.
Step Four
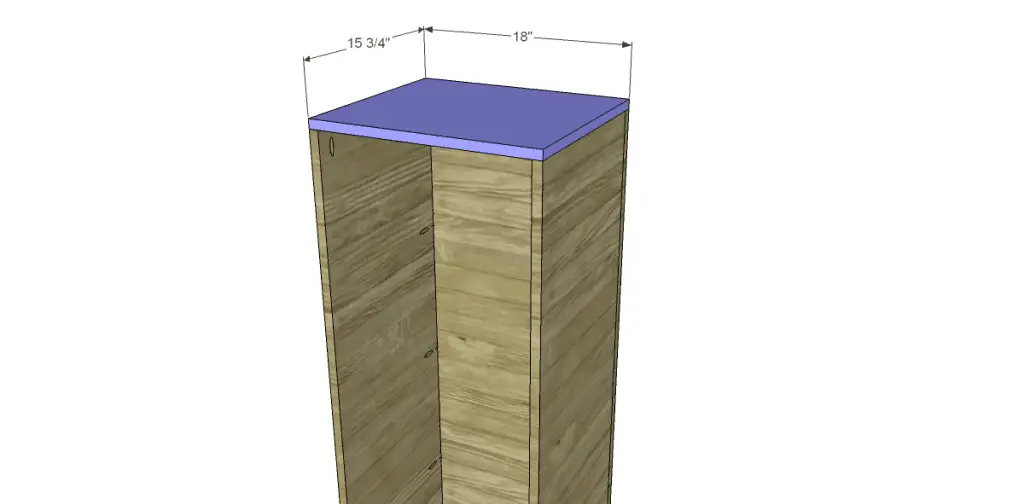
Cut the piece for the summit. Attach the top to the sides and back using glue and pocket pigsty screws through the pocket holes at the top of the sides and back into the tiptop.
Footstep Five
Cutting the pieces for the inner supports. Drill pocket holes in each end. Adhere to the sides equally shown with glue and pocket pigsty screws.
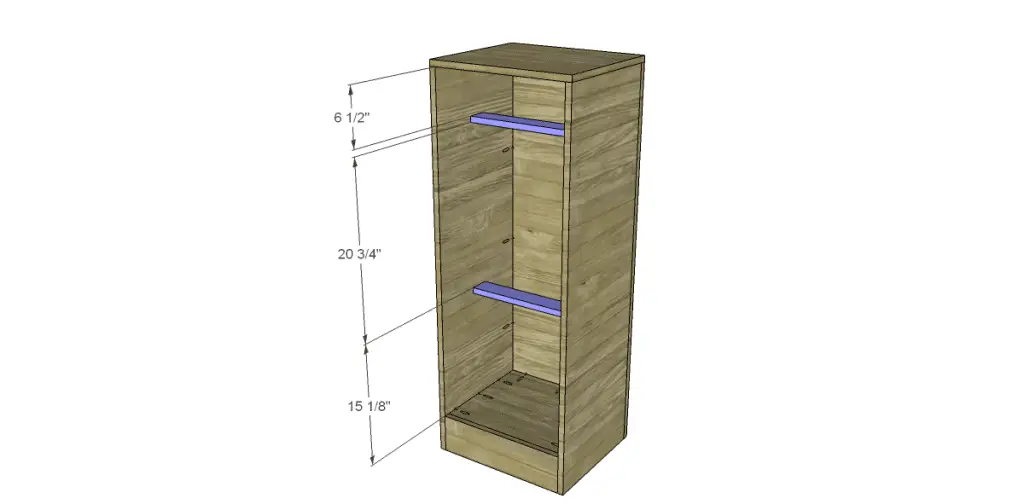
Step Six
Cut the pieces for the drawer boxes. They can be assembled using gum with pocket holes (for 1/ii″ material), brad nails, or countersunk screws. I used glue and brad nails to assemble the drawers for my file cabinet. Attach the bottom using mucilage and brad nails.
Stride 7
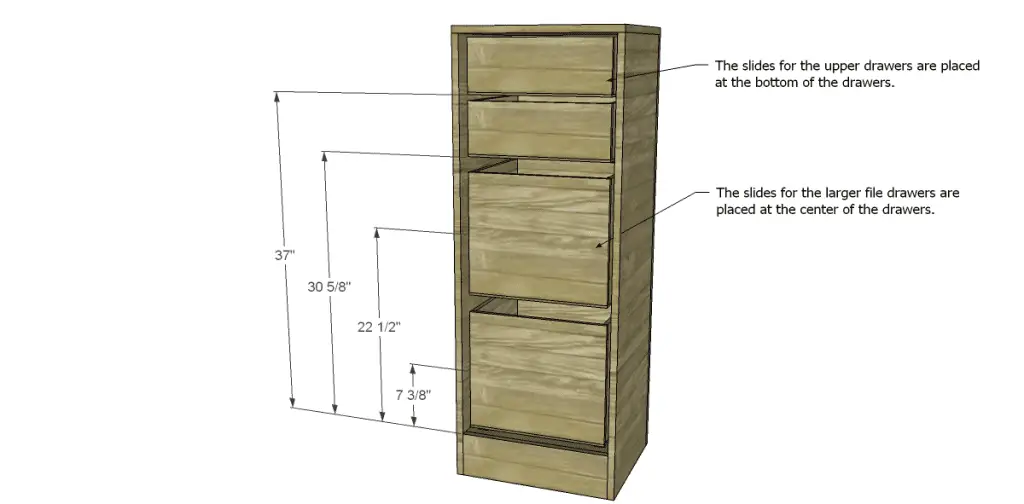
Attach the drawer hardware according to the manufacturer's instructions. The dimensions shown on the cartoon are to the bottom of the smaller upper drawers, and the centre of the larger lower drawers.
Stride Viii
Cut the pieces for the drawer fronts. At that place will be a i/viii″ gap between the fronts to permit the drawers to freely open and close. For an easy tutorial on how to attach the fronts, click here.
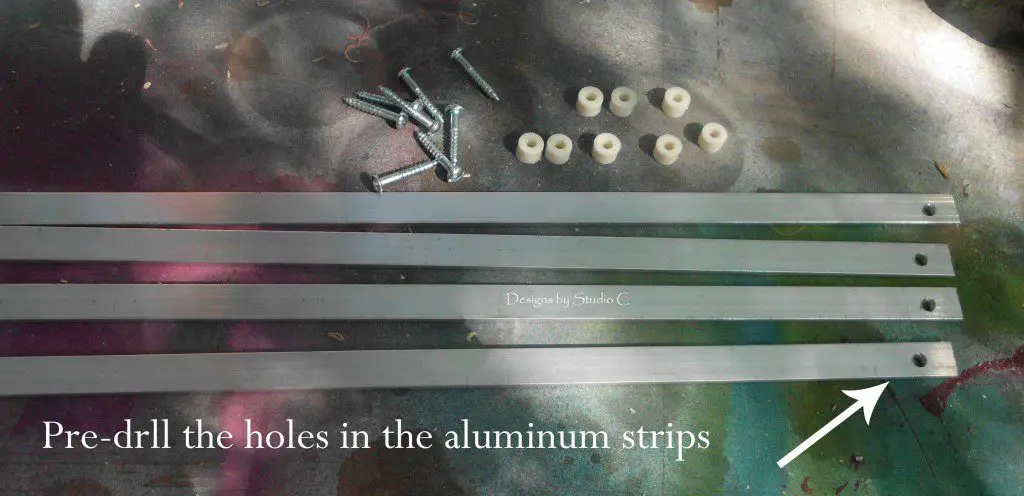
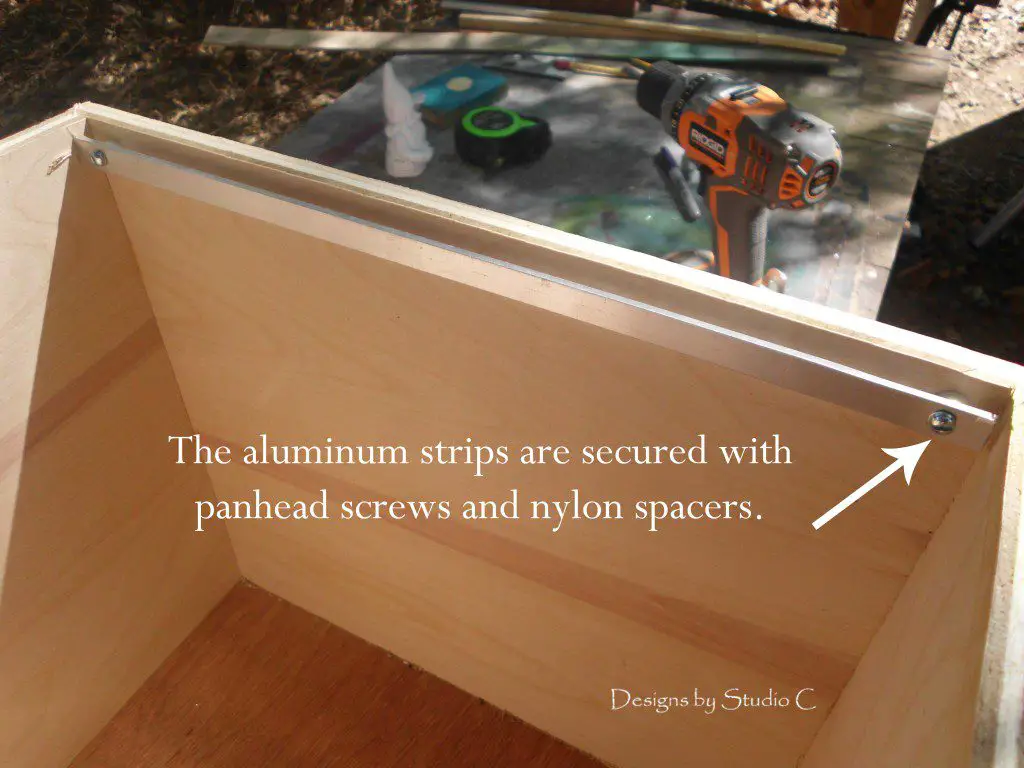
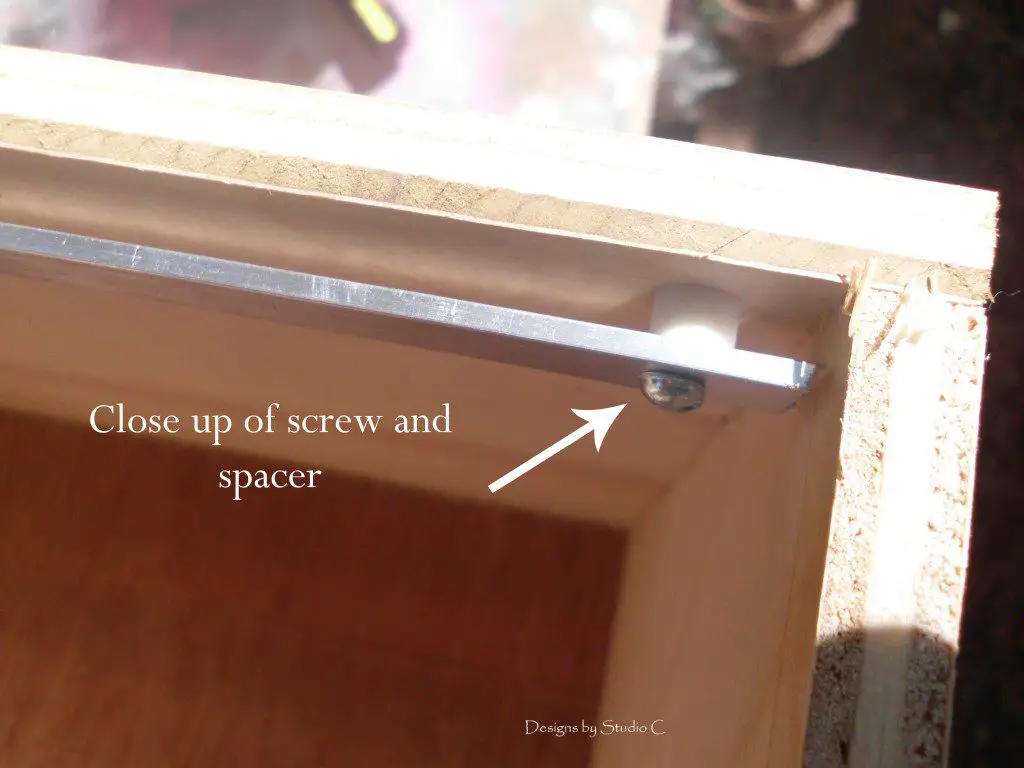
Step Nine
To adhere the aluminum strips for the file folders, cutting the strips into four 13″ long pieces. Pre-drill a hole in each end of the strip and attach the strips with the ane″ pan caput screws each through a spacer into the larger drawer boxes.
Terminate the file cabinet equally desired. Have any questions near the gratuitous furniture plans to build a file cabinet? Leave a comment beneath!
Originally posted 2012-09-04 08:00:25.
Source: https://designsbystudioc.com/free-furniture-plans-to-build-a-file-cabinet/
0 Response to "Free 2 Drawer File Cabinet Plans"
Post a Comment